Segments
Segments allow you to create logical groupings of your pages based on your needs, which you can then use to make your reporting more effective and to customize the auditing suite.
If you're new to segments, watch this short video to learn what segments are and how they can turbocharge the way you do SEO:
[intro music]
Websites today easily run into the thousands or even hundreds of thousands pages.
And let's face it, all pages are NOT created equal.
Your website has is main content pillars, it probably has a blog, and even some customers support content.
If you're in eCommerce, you've got product category and product detail pages too.
And then there are other qualities to consider, like page importance.
Pages getting the bulk of your traffic, or driving the most revenue, are much more important to you than others.
And this is where the Conductor Website Monitoring Segments come in!
They make it easy to cut through the static by grouping pages together, based on any page property you want.
Setting Segments up is a breeze and once done there are so many ways to work with them.
Use them for more focused reporting, set uzp custom alerts, and target your auditing on specific parts of the website.
Conductor Website Monitoring comes with one default segment: Important pages. This segment includes the most important pages on the website based on Conductor Website Monitoring’s Importance score.
However, you can also create as many custom segments as you want, based on any filter criterion or any combination of different filter criteria.
Segments are dynamic
Segments are dynamic, which means that when pages start matching the underlying filter criteria they will automatically be placed in the segment. Conversely, pages that stop matching the filter criteria will be removed from the segment.
For example, let's say you create a segment for pages within the /blog/ URL directory called "Blog articles". Now whenever you publish a new blog article it will be automatically included in this segment.
Segment suggestions
You are completely free to segment on any criterion you want, but here are some examples to get you started:
-
Indexable pages
Use the Indexable column to create a segment for all indexable pages on your website to ensure that there are no issues with indexing your content. - Main categories / topics Perhaps a no-brainer, but creating segments around your main categories or topics is a great way to leverage the power of segments.
-
Recently added pages
Filter on "less than 7 days ago" in the Discovered and create a segment for this. -
High performers
Connect with Google Analytics or Google Search Console and set up a segment for pages with Top 5% Pageviews. -
Slow pages
Filter on "more than 600ms" in the Download time column.
Creating segments
Segments are created in the Segment editor, which can be accessed in multiple ways:
Accessing the Segment editor from the Pages screen
When filtering on any column on the Pages screen, you can jump directly to the Segment editor and create the segment with the filter criteria that you’re currently using:
Accessing the Segment editor from Settings
You can also access the Segment editor directly without having to configure any filters:
Creating a segment in the Segment editor
The process of creating a segment consists of 4 steps:
Note: a segment can be created without a size limit (3rd step) in case filter criteria are set, or without filter criteria (2nd step) in case a size limit is set.
The individual steps are described below.
Setting a label
To set a label for a segment, follow these steps:
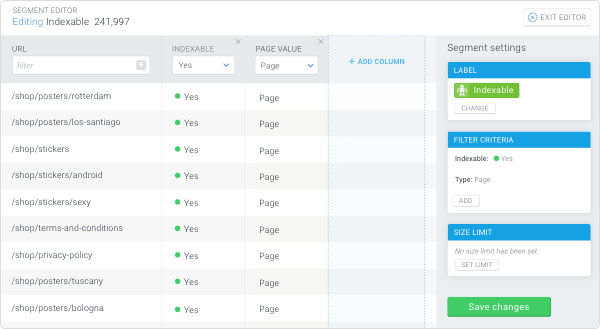
Setting filter criteria
To set a filter criterion for a segment, follow these steps:
To add more filter criteria, easily add more columns by repeating the above-described process.
To remove a filter criterion from the segment definition, click the cross icon in the top-right corner of the given column.
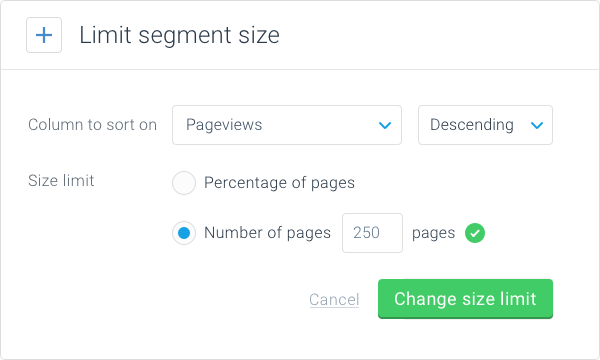
Setting a size limit
Limiting the segment size will set the maximum number of pages that the segment will contain. To set a size limit for a segment, follow these steps:
Saving the segment
Once you have set the label, the filter criteria and/or the size limit for the segment, you can save the segment by clicking the Save segment button in the bottom-right corner of the Segment editor.
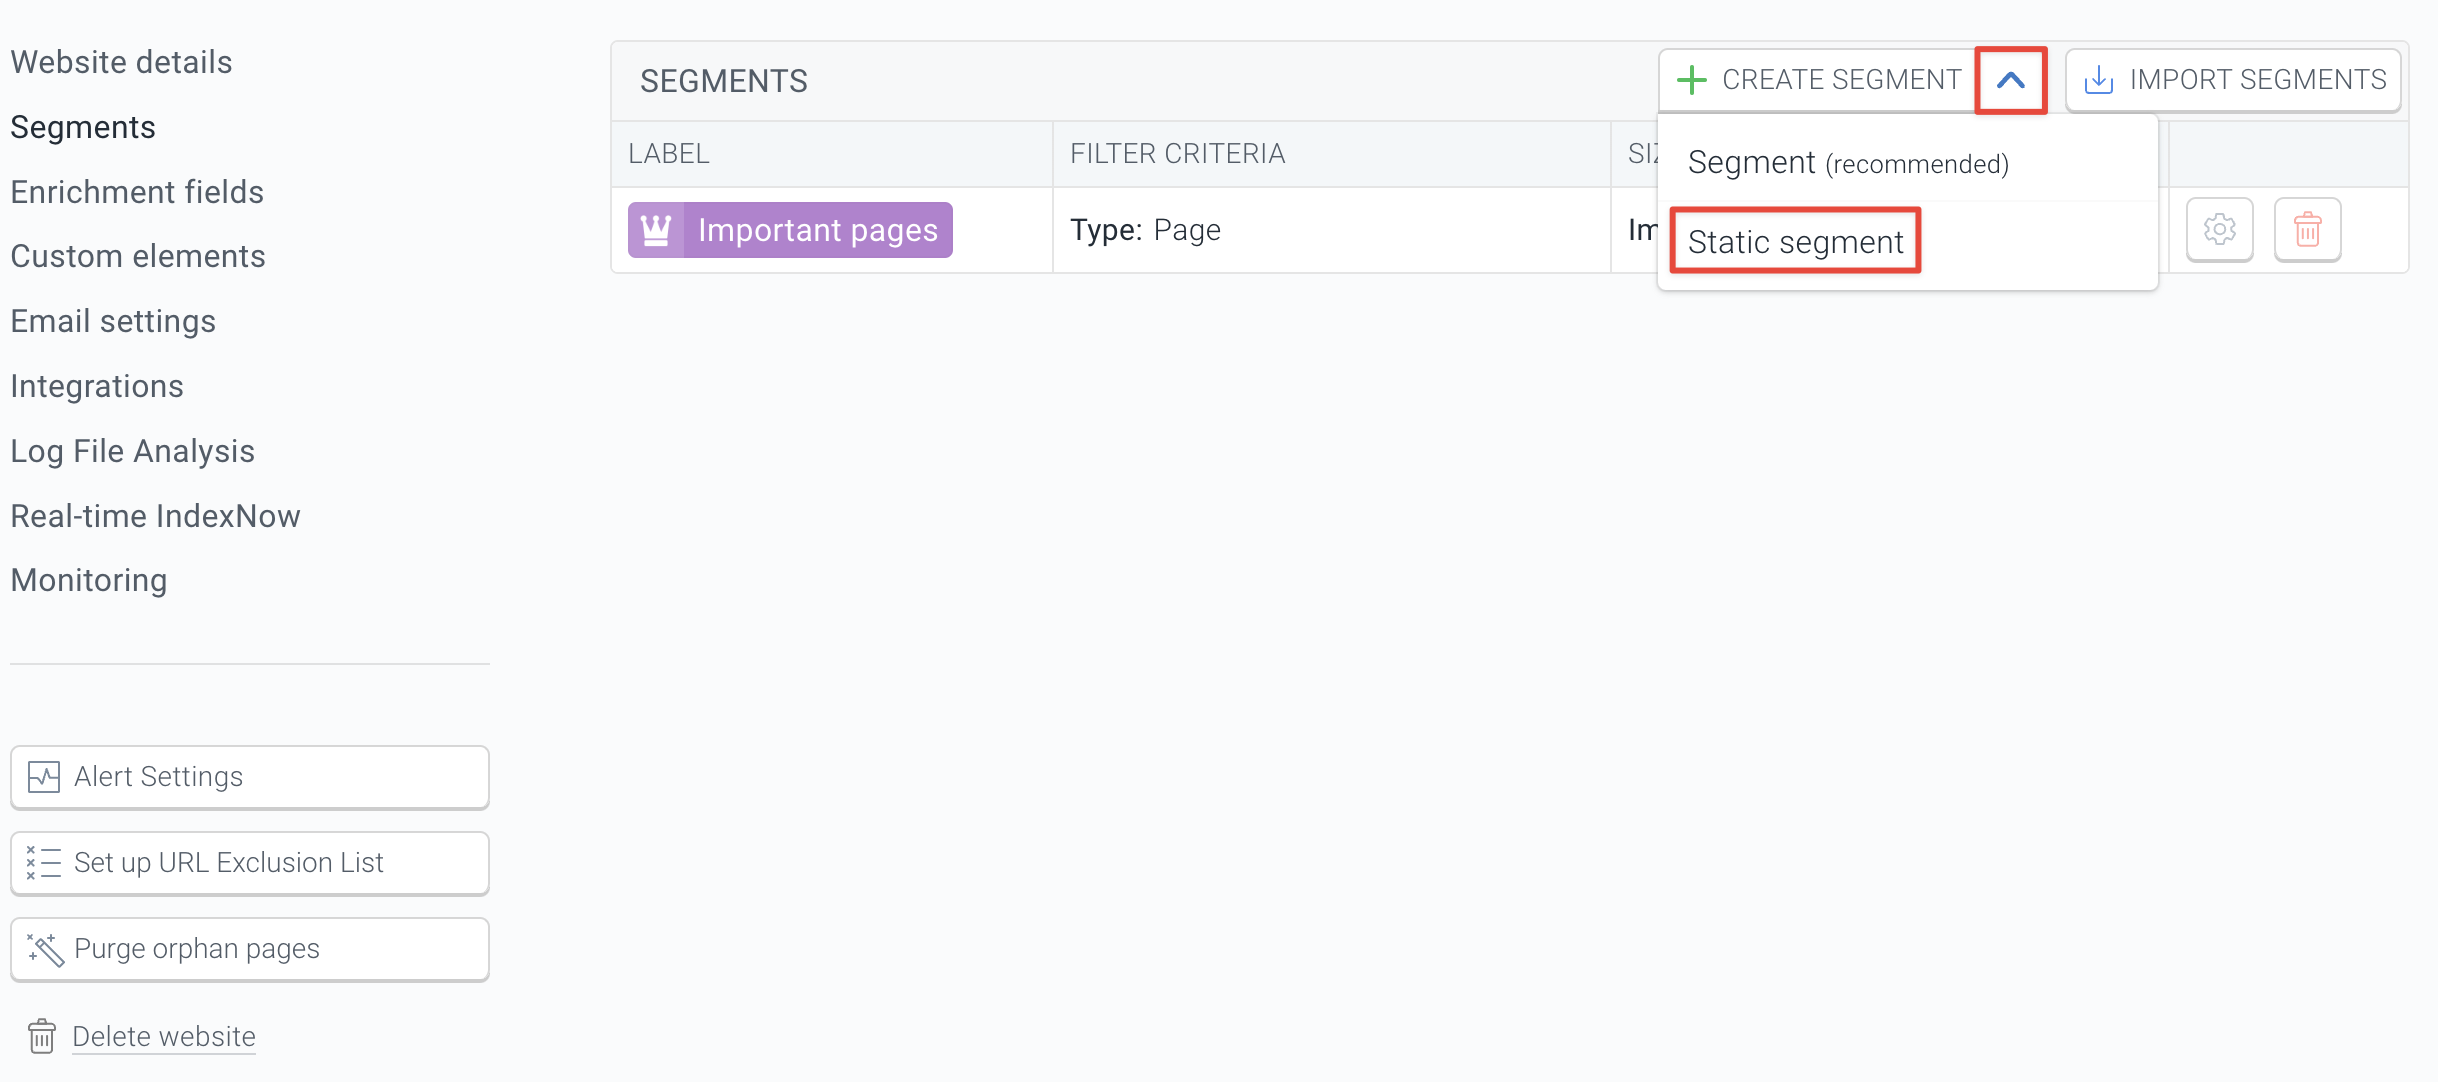
Creating a Static segment
In most situations, the filters that Conductor Website Monitoring has out of the box are sufficient and a preferred way to segment your pages.
However, if you want to group certain pages together that can't be grouped with the filters, you can create a Static segment!
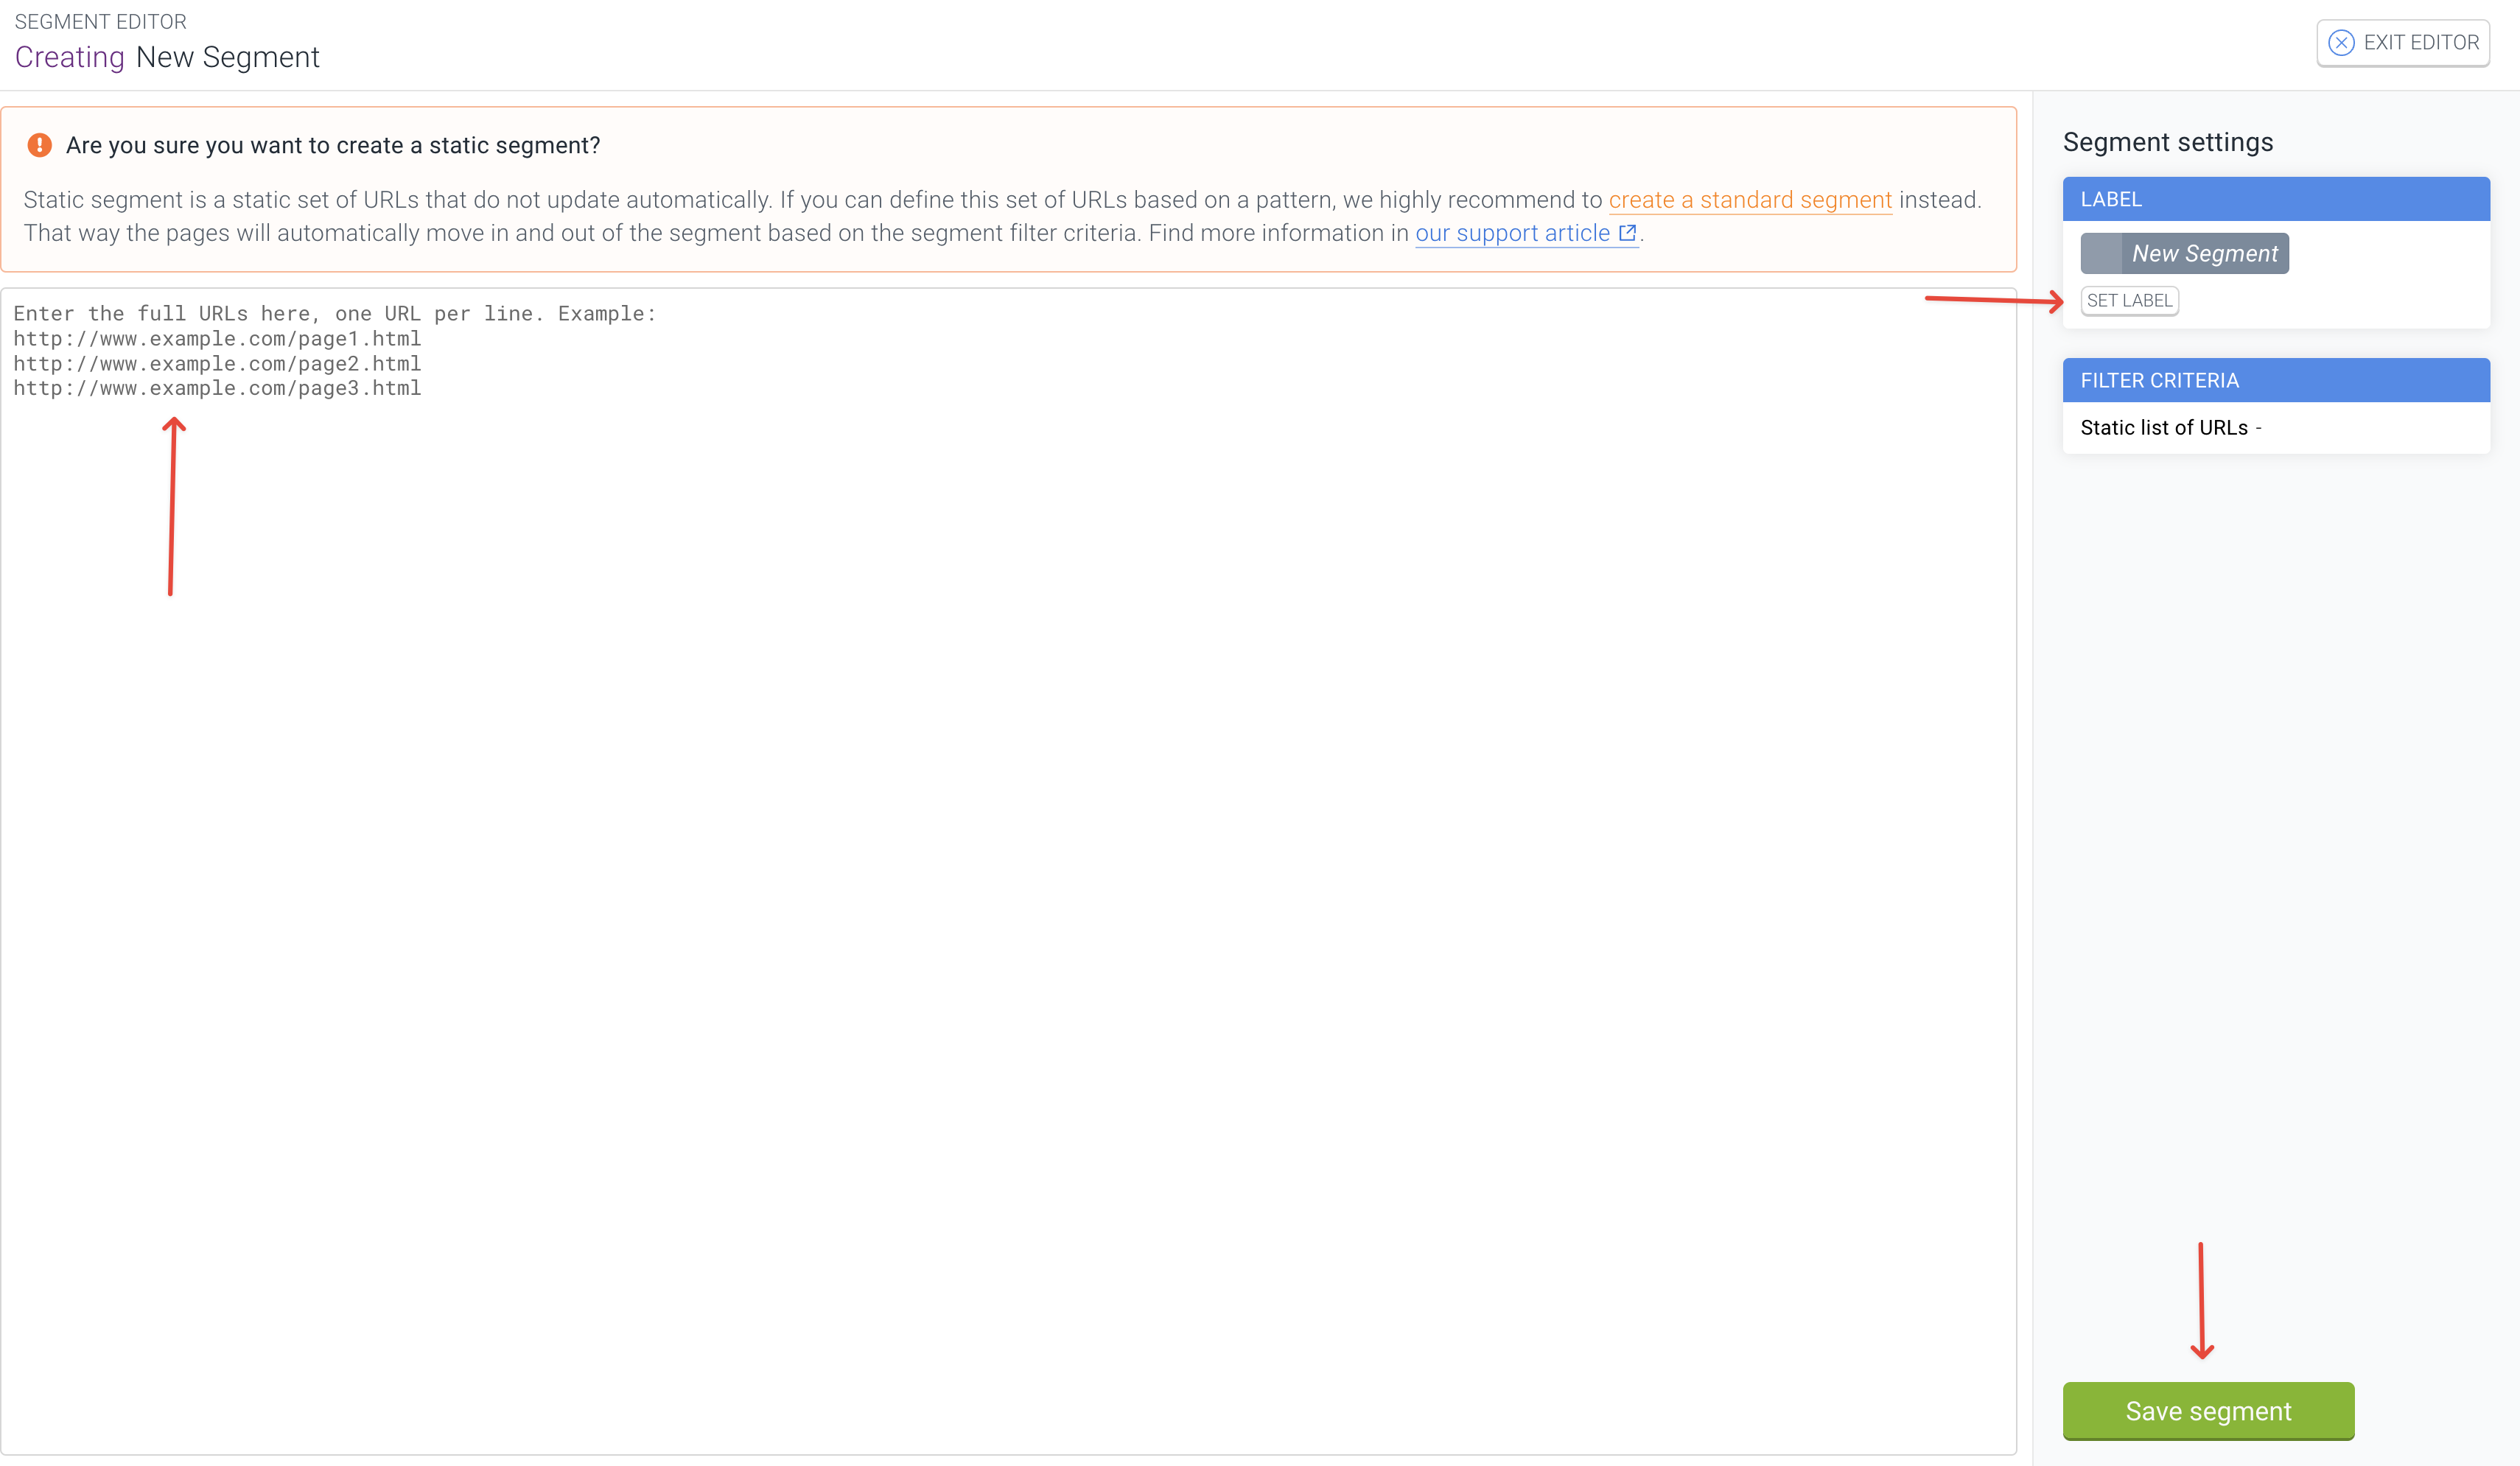
Static segments should only be used as a last resort, as opposed to dynamic segments, they don't update automatically, so they can't be used for alerting.
You can create a static segment in the following way:
Working with segments in Conductor Website Monitoring
There are multiple places across our platform where you can use the segments that you’ve created.
Using segments for filtering on the Pages screen
On the Pages screen, you can use the Segment column to filter on a specific segment, and even combine multiple segments in the filter:
Now you will only see pages that are in both segments.
Want to see pages that are in either one segment? Then toggle the AND/OR button to OR.
Or what about pages that are in one segment but NOT in the other? Simple: just drag the segment you want to exclude to the And not included in container.
Using segments on the dashboard & in the Conductor Website Monitoring Weekly Report
The Dashboard screen in Conductor Website Monitoring shows you the most important data for all scopes that are defined on the website.
You can configure which scopes will be shown on the dashboard using the Scope dropdown.
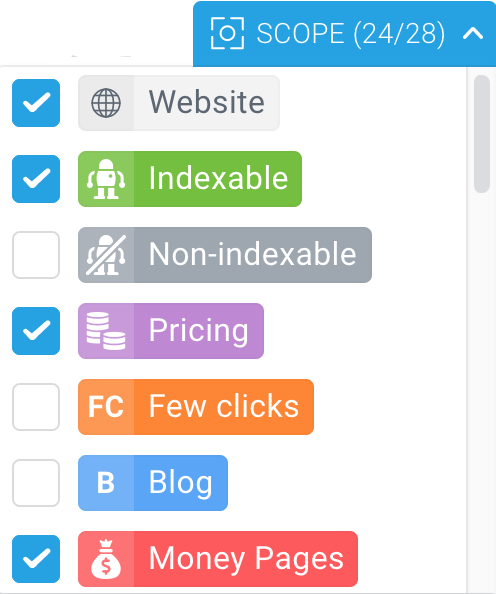
The scopes configuration from the dashboard also applies to the scopes included in the Weekly Report. You can read more about this here.
Using segments in Issues
There are two ways how you can use segments in the Issues section in Conductor Website Monitoring:
Filter out issues for a specific segment
The Segments filter in the Issues section allows you to view the issue data for a specific segment.
So for example, if you have created a segment for your most visited pages, you can easily view the most pressing issues detected in this segment using the Segments filter.
Ignore issues in specific segments
Conductor Website Monitoring also allows you to ignore issues in specific segments to tailor the auditing suite to your specific needs. You can read more about this here.
Using segments together with Alerts
In Conductor Website Monitoring you can create different alert definitions for different segments of your website with different configurations.
For example, you can set up alert definitions with the highest Sensitivity level for the most important segments on your website to make sure you are alerted about every single change in these segments. You can read more about this here.
On top of that, you can also set up alerts for pages entering or leaving a segment. This feature is very powerful as it offers a wide range of configuration possibilities, essentially allowing you to be alerted about any element on your website that is important for you.
You can read more about this here.
Managing segments
Segments overview
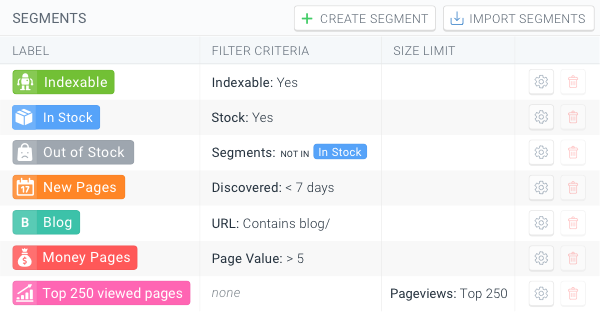
You can find an overview of all segments on a website in the Segments tab of the Settings section:
Editing segments
You can edit your existing segments at any time. To edit a segment, follow these steps:
Deleting segments
You can also delete any segment that you don’t need anymore. To delete a segment, follow these steps:
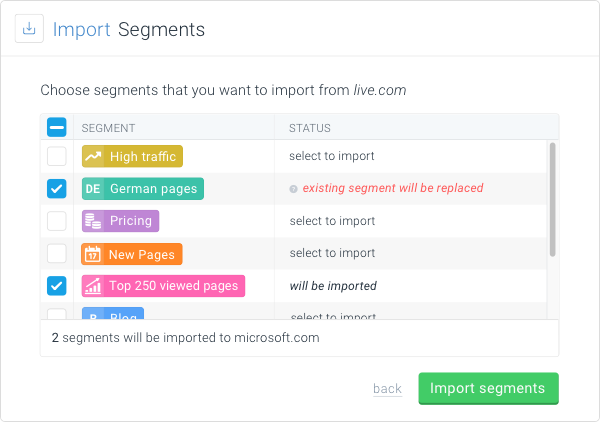
Importing segments
Conductor Website Monitoring also allows you to import segments from one website to another.
Thanks to this option you don’t need to create segments from scratch on each website, but you can simply import your existing segments from one website to another.
To import segments to a website, follow these steps:
Need help?
If you need a hand setting up the segments or you have any questions that are not covered by our documentation, don’t hesitate to contact us!

