Real-time IndexNow
With ContentKing’s unique Real-time IndexNow feature, you don’t have to worry about submitting your important page changes to IndexNow, ContentKing will do that for you!
Using real-time monitoring, ContentKing tracks every change happening on your website. Each change is then instantly assessed, and if selected criteria are met, will be automatically submitted to IndexNow.
What is IndexNow
Websites can now get content changes easily discovered and indexed with IndexNow, a new protocol from Microsoft Bing (opens in a new tab) and Yandex that notifies search engines when content is added, updated or removed on a website.
Setting up Real-time IndexNow
The process of configuring Real-time IndexNow consists of two phases:
-
Generating an IndexNow API key and verifying the ownership of the website
-
Setting up Real-time IndexNow in ContentKing
Generating an IndexNow API key
Please follow the steps below to configure the API key and verify the ownership of the website.
1. Generate API key
API key is needed to match the ownership of the domain along with submitted URLs. The API key should be a minimum of 8 and a maximum of 128 hexadecimal characters.
The key can contain only the following characters: lowercase characters (a-f), uppercase characters (A-F), and numbers (0-9).
You can generate the API key here (opens in a new tab).
2. Verify the ownership of the website
You must host a UTF-8 encoded text key file {your-key}.txt listing the key in the file at the root directory of your website.
For instance, you will need to host your UTF-8 key file at https://www.example.org/7ae1f6c10bc648c1bf556d1e51496722.txt and this file must contain the key 7ae1f6c10bc648c1bf556d1e51496722.
For more information about the IndexNow API key, you can refer to the IndexNow protocol (opens in a new tab).
Enabling Real-time IndexNow in ContentKing
To enable the Real-time IndexNow in ContentKing follow these steps:
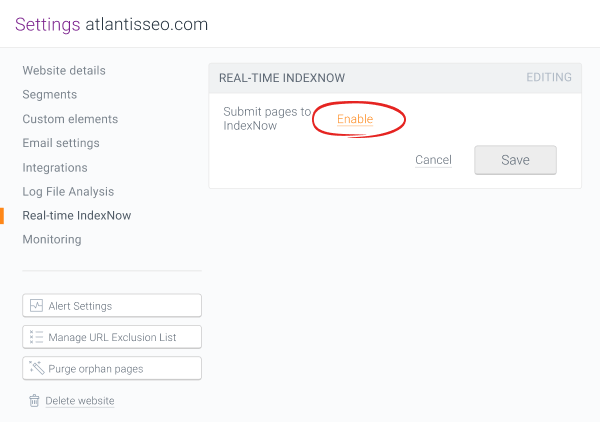
1. Enable Submit pages to IndexNow toggle
Open the Website settings and tap on the Real-time IndexNow box. This will open the Real-time IndexNow settings screen where you can enable the Submit pages to IndexNow toggle.
2. Enter the IndexNow API key
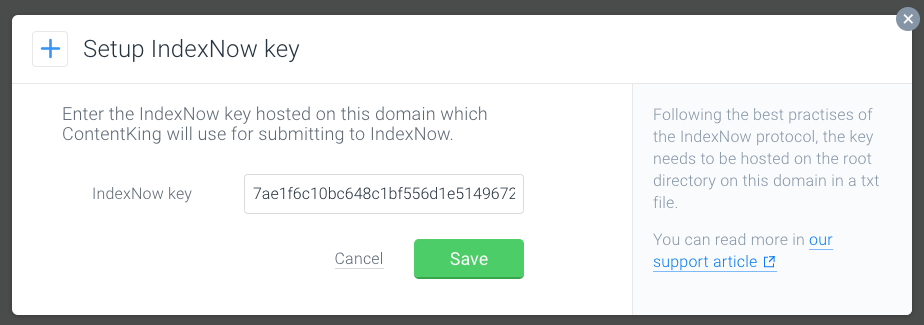
Once you enable the Submit pages to IndexNow toggle a screen where you can enter your IndexNow API key will open. Add the API key which you have generated in the previous steps and tap on the Save button.
Defining what should be submitted to IndexNow
As you don’t want to waste your precious crawl budget (opens in a new tab) on irrelevant changes or changes that have a negative impact on your SEO, ContentKing allows you to customize the criteria on what changes should be submitted to IndexNow with Triggers and Conditions.
For both triggers and conditions, ContentKing has smart defaults in place, however, you can customize them to fit your needs.
Triggers
With triggers, you can define which changes will trigger ContentKing to submit a URL to IndexNow. In ContentKing we have the following triggers:
Page status changes
- Indexable page was added
-
Indexable page became redirected (URL returning a
2xxstarted returning a3xxstatus code) -
Indexable page became missing (URL returning a
2xxstarted returning a4xxstatus code) -
Indexable page was restored (URLs returning a
3xx,4xx, or5xxstarted returning a2xxstatus code) - Pages became indexable
- Pages became non-indexable
All Page status changes are selected by default, except “Pages became non-indexable”.
More about how ContentKing determines indexability here.
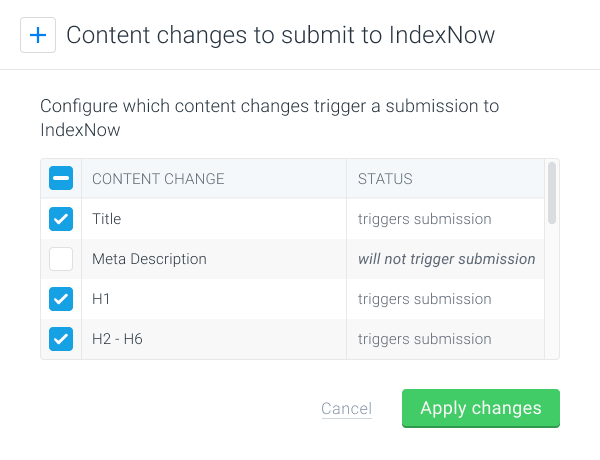
Content changes
- Page title changes
- Meta description changes
- H1 heading changes
- H2 - H6 headings changes
All Content changes are selected by default.
Custom Element changes
ContentKing gives you the possibility to combine two powerful features, Custom Element Extraction and IndexNow! If you have Custom Elements set up, you can choose which Custom Element changes will trigger ContentKing to submit a URL to IndexNow.
ContentKing will not select them as triggers by default, but you can add them manually.
Customizing the triggers
If you want to customize the IndexNow triggers, just follow these steps:
Conditions
Having customizable triggers in place is not enough to ensure that only positive changes are submitted to IndexNow. What if a page becomes indexable but the page title is missing? That is where conditions come into play!
After a change triggers the page for submission to IndexNow it needs to pass certain conditions before that happens. Same as with triggers, you can also customize the conditions to your needs.
The one condition that always needs to be passed - the page needs to be indexable.
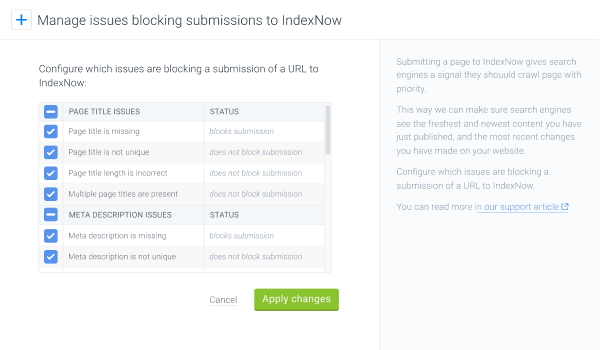
Issues blocking submission
If a page has certain issues open in ContentKing, you probably want to fix those issues before the page is submitted to IndexNow.
You can specify which open issues will be preventing the page from being submitted to IndexNow. The issue categories that you can select are the following:
-
Page title - issues selected by default:
- Page title is missing
- Page title is not unique
- Multiple page titles are present
-
Meta description - issues selected by default:
- Meta description is missing
- Meta description is not unique
- Multiple meta descriptions are present
-
H1 heading - issue selected by default:
- H1 heading is missing
-
Canonical link - issues selected by default:
- Canonical link is missing
- Multiple canonical links are present
- Hreflang - no issues are selected by default
-
Robot directives - issue selected by default:
- Invalid robot directives present
-
Schema.org - issue selected by default:
- Schema element with invalid JSON-LD object present
To customize which issues will be preventing the page from being submitted to IndexNow, follow these steps:
Segments allowlist and blocklist
You can utilize the power of Segments to define which pages should be either allowed or blocked from being submitted to IndexNow. Segments allow you to create logical groupings of your pages based on your needs.
You can choose whether you want to use an deny-list (Allow all except) or an allow-list (Deny all except) to configure whether pages from the chosen segments will be blocked from being submitted to IndexNow.
To configure segments allowlist or blocklist follow these steps:
URL allowlist and blocklist
Along with using segments, you can also specify which URLs you want to be submitted to IndexNow by configuring the URL allowlist or blocklist for IndexNow.
This way you can easily allow or deny certain parts of the website from being submitted to IndexNow based on the URL patterns.
To configure URL allowlist or blocklist follow these steps:
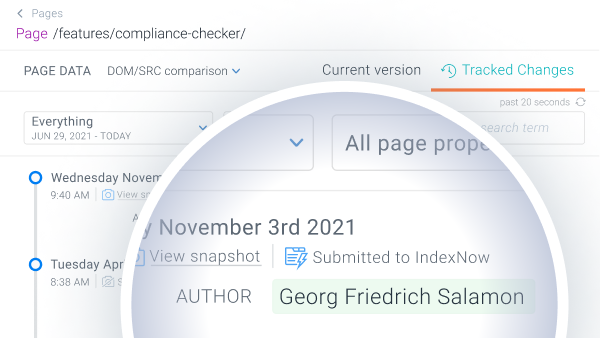
Checking if a URL was submitted to IndexNow
If you want to check if a certain change triggered ContentKing to submit a URL to IndexNow, just follow these steps:
Need help?
In case you have any questions regarding Real-time IndexNow that are not covered by our documentation, don’t hesitate to contact us!

