Change Tracking on Pages
ContentKing is monitoring your websites 24/7 and keeps track of all important changes, both technical and content-related. Whether you want to view newly added pages, removed pages or check what has changed within your pages, ContentKing has you covered.
Apart from providing you with real-time data about the pages and their SEO properties, ContentKing also tracks changes to these pages and properties historically, enabling you to see how the pages within the website changed for any date range you select.
In ContentKing you can view the tracked changes on two levels:
- on a single page
- across the whole website
Viewing tracked changes on a single page
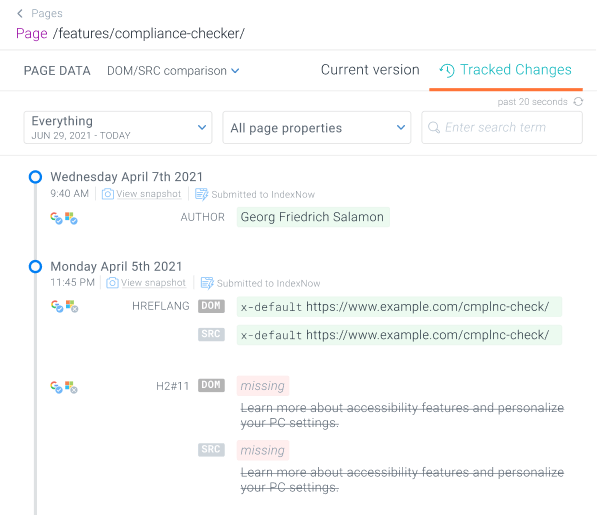
When you want to check all changes that have been tracked on a specific page within the website, you can click on the page on the Pages screen. You will get to the page detail screen where you can navigate to the Tracked Changes tab.
In the Tracked Changes tab, you will see a timeline with a full history of the tracked changes up to 60 months back (depending on your Data Retention) together with the exact timestamps of when each change was tracked:
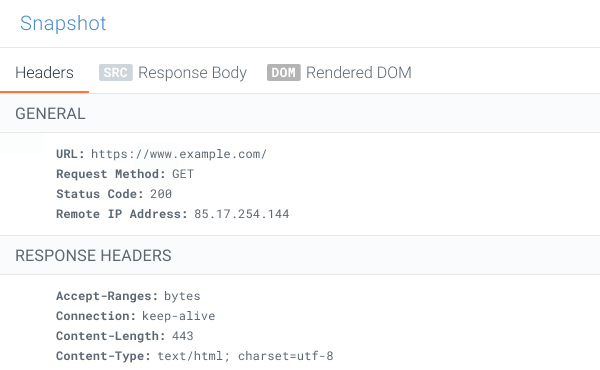
Furthermore, for each change that ContentKing tracks, you can also view a snapshot of the request headers that we sent to the server and the response headers that we received from the server at that point:
Viewing tracked changes across the whole website
You can also track page changes across the whole website. These tracked changes can be accessed from multiple entry points in ContentKing:
- The Pages screen
- The Dashboard screen
Access from the Pages screen
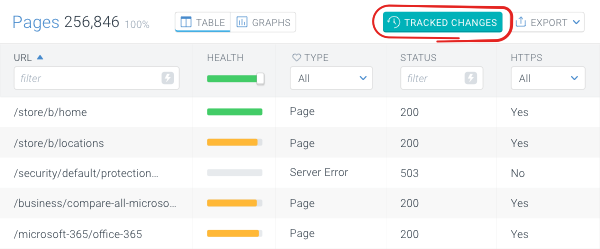
When you are on the Pages screen, you can access the tracked changes by clicking the Tracked Changes button in the top-right corner.
Access from the Dashboard screen
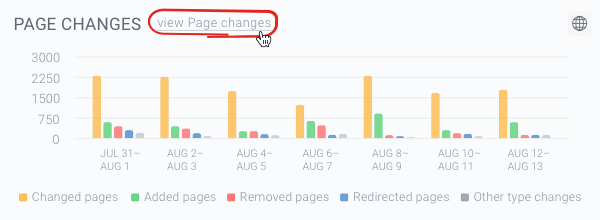
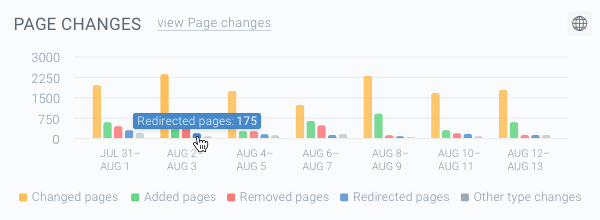
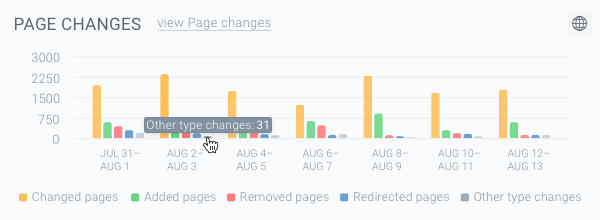
The Page Changes chart on the dashboard in ContentKing shows you the changes that were tracked on the website within the selected date range. You can change the date range in the top-right corner of the dashboard.
By clicking the View page changes button or the individual bars within the chart, you will get to the Change Tracking screen in Pages where you’ll see the actual changes reported in the chart.
Types of tracked changes
There are 5 main types of page changes that ContentKing tracks on your website:
Changed pagesAdded pagesRemoved pagesRedirected pagesOther type changes
Changed pages
This change type includes changes in all of the page properties that ContentKing tracks (as represented by the individual columns on the Pages screen).
This change type is related to pages whose Type didn’t change within the selected date range. They were a Page (2xx) at the start date as well as on the end date, but at least one property (column) changed on them. Such a page is marked as Changed.
ContentKing tracks changes in all properties that are represented by a column including Custom Elements, except for the following:
- Incoming internal links
- Incoming canonicals
- Incoming redirects
- Outgoing internal links
- Outgoing external links
- Page Speed
Data in the columns listed above is not being tracked historically at the moment, which means that they are disabled for Change Tracking and only show the current (real-time) values.
You can read more about all the columns and properties tracked by ContentKing here: Columns
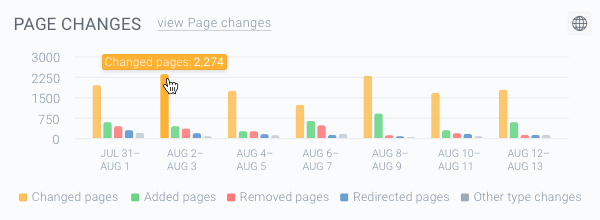
The Changed pages are marked orange on the charts in ContentKing.
Added pages
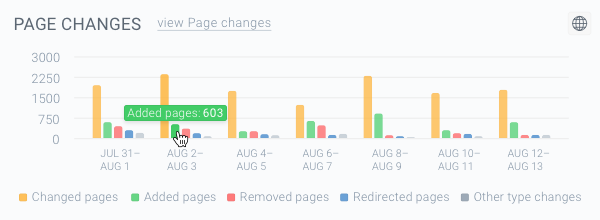
This change type represents all pages that were either newly discovered by ContentKing in the selected date range or their Type changed to Page after being a non-page – such as a Redirect or Missing (more about this here).
The Added pages are marked green on the Page Changes chart in ContentKing.
Removed pages
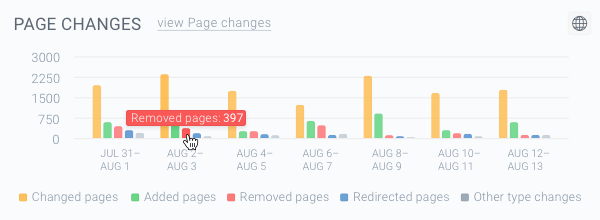
This change type represents all pages that became Missing in the selected date range, meaning that their Type changed from Page to Missing (4xx).
The Removed pages are marked red on the Page Changes chart in ContentKing.
Redirected pages
This change type represents all pages that became a Redirect in the selected date range, meaning that their Type changed from Page to Redirect (3xx).
The Redirected pages are marked blue on the Page Changes chart in ContentKing.
Other type changes
This change type represents all pages that became a Server Error (5xx) or Unreachable in the selected date range, as well as all the other non-page changes (Redirect, Missing, Server Error, Unreachable).
The Other type changes are marked grey on the Page Changes chart in ContentKing.
Working with Tracked Changes
When viewing the Tracked Changes on the Pages screen, there are three different controls at your disposal to narrow down the result set and get the tracked changes you are looking for:
- Setting a date range
- Using the Change Type filter
- Using the Segments and other filters
Setting a date range
After you access the Page Change Tracking screen, you can select the date range for which you want to view the changes.
The start date and the end date of the date range determine the two versions of a page that are being compared. If the version of the page on the start date differs from the version of the page on the end date, the difference between these two versions of the page is displayed as a tracked change.
In case of accessing this feature from the dashboard, the date range is already pre-set based on the data you clicked in the chart. However, you can also set a custom date range according to your needs.
To set or change the date range, click the Change Date Range button in the top-right corner of the screen. You will see the following panel with a calendar:
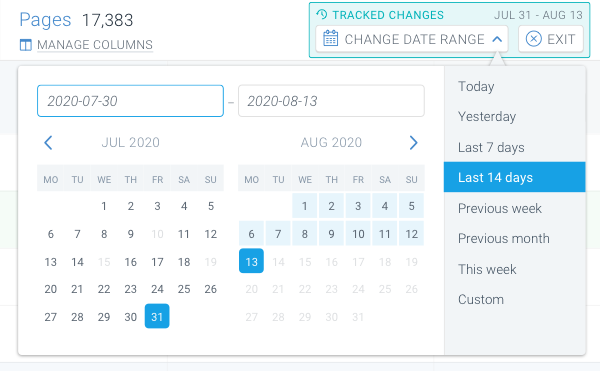
On the right side of the panel, you can select a predefined date range. You can choose:
- Today
- Yesterday
- Last 7 days
- Last 14 days
- Last 4 weeks
- Previous week
- This week
- Custom
To set a custom date range, just select the start date and the end date in the calendar. For the past 14 days, you can always select daily intervals. If you want to go further back than the past 14 days, you can only track changes in weekly intervals.
Using the Change Type filter
To do that, you can use the Change Type column on the left side of the screen to filter on the different change types as described above:
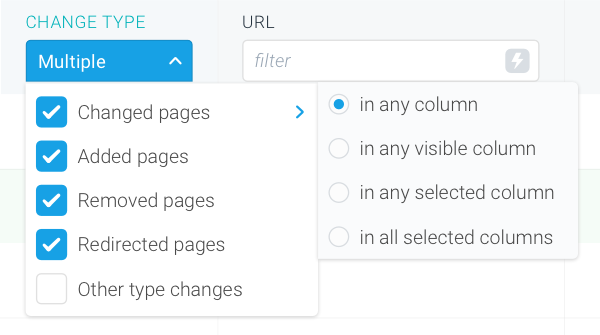
The Change Type filter has the following values:
Changed pagesAdded pagesRemoved pagesRedirected pagesOther type changes
For the Changed pages value, there are also advanced operators available:
in any columnin any visible columnin any selected columnin all selected columns
These operators allow you to filter out the specific property changes that you are looking for.
Changed in any column
When you select this operator, you will see all pages that changed in any of the columns.
You can see in which columns a page changed by hovering over the Changed label in the Change Type column.
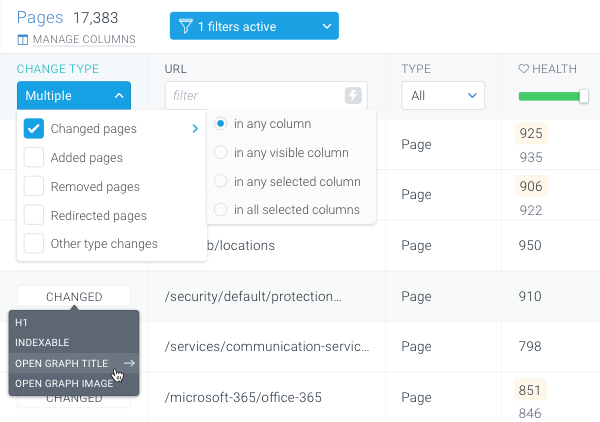
Changed in any visible column
When you select this operator, you will see all pages that changed in any visible column.
For a column to be visible, it needs to be included in the current column set and enabled in the Manage Columns section. You can read more about this here.
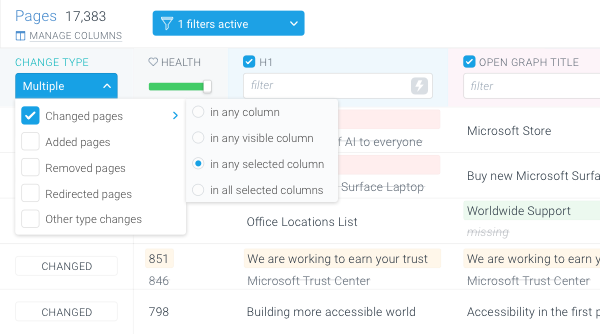
Changed in any selected column
With this operator you see pages that changed in any column that you have selected.
After selecting this operator in the filter, a box will appear at the top of each column which you can tick and thus select the columns:
- When you select one column, you will see all pages that changed in that column.
- When you select multiple columns, you will see all pages that changed in any of the selected columns.
Changed in all selected columns
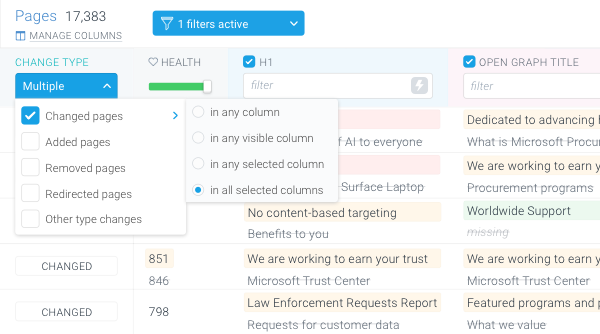
With this operator you see pages that changed in all columns that you have selected.
After selecting this operator in the filter, a box will appear at the top of each column which you can tick and thus select the columns:
- When you select one column, you will see all pages that changed in that column.
- When you select multiple columns, you will see all pages that changed in all of the selected columns at the same time.
Using the Segments and other filters
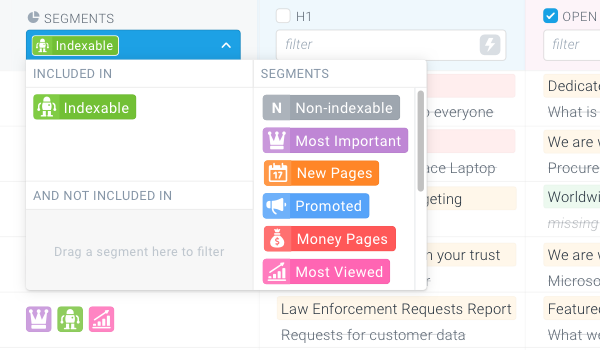
You can also use the other columns on the Page Change Tracking screen to narrow down the result set.
For example, if you are only looking for changes in a certain segment, you can use the Segments filter to get this data:
Need help?
If you have any questions about Change Tracking on Issues, don't hesitate to reach out to us and we will be happy to help!

